
How to Replace a Basement Window
By Sean, DIY enthusiast & master of sarcasm. Last updated February 3, 2024.

This post contains affiliate links. As an Amazon Associate, I earn from qualifying purchases at no additional cost to you. Thank you!
A basement window replacement can be an easy (and fun!) activity for the weekend that helps you further your DIY skills and has a positive effect on your home’s value. Every basement window is different, but with a few common skills, you can get rid of that old, drafty window and replace it with an energy-efficient, good-looking one!
My 1917 farmhouse was originally just three rooms built on a concrete foundation with a crawlspace underneath. At some point after the house was built, two additions were added to the back, one of which sits on top of a basement. Two of the three basement window units were boarded over when I bought the house (and still are, actually). The third was nothing more than a simple DIY frame with a single pane of glass inside. In fact, it didn’t even have traditional hinges or a lock.
The window didn’t leak, but it didn’t look good and was completely energy inefficient. So, as part of my continuing basement renovation saga, I decided it was time to upgrade the window. Read on for step-by-step details about how I did it!
Table of Contents:
The Existing Basement Window
Removing the Old Basement Window
Necessary Tools
How to Remove a Basement Window
Prepping the Opening for a New Basement Window
How to Install a Basement Window
Necessary Tools
How to Install a Basement Window Step-By-Step
Trimming Out the Window
FAQs About Basement Window Replacement
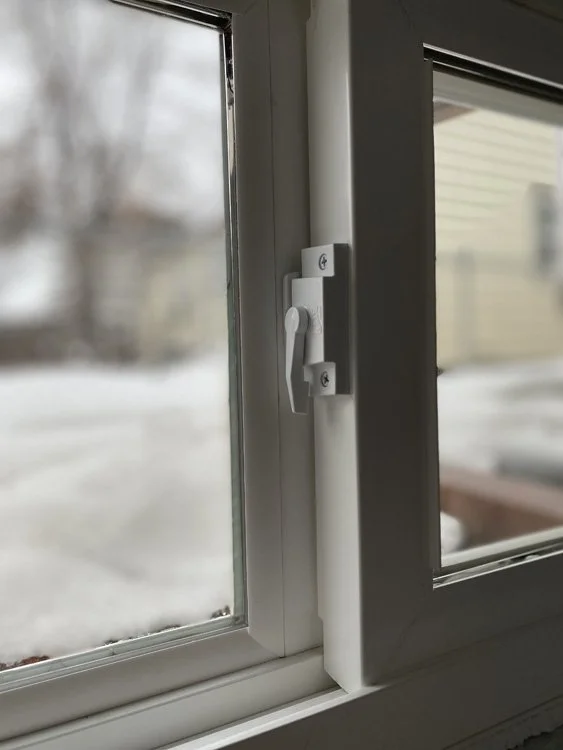
The Existing Basement Window

I was fortunate in that my basement window replacement was extremely simple. On the one hand, the existing window was set inside a rough opening in the concrete foundation that had already been framed out, eliminating the need for me to do that myself. On the other hand, the window opening was very small, so it wasn’t difficult to manhandle the old window out of there and put the new window in by myself.
As you can hopefully see in the terrible photo above that I took when I bought this house in 2018, the old basement window is one of those teeny-tiny non-egress things. It’s in what is in the process of becoming my media room (which I’ll tell you about eventually). As I noted earlier, the existing window was a DIY job that held up fine over the years, but the single-pane glass was simply far too inefficient for our brutally cold winters here in Wyoming. So, it had to go!
Before removing the old window, I measured the rough opening. It was an unusual size, so I ordered a custom Jeld-Wen window from my local Menards. Learning how to measure a replacement window opening is a whole post in and of itself, but basically, order the window slightly smaller than the opening. You can make a window in a bigger opening work. The inverse is a much more difficult undertaking!
Removing the Old Basement Window
Necessary Tools:
How to Remove a Basement Window

As I mentioned earlier, my basement window was mounted inside an opening that had already been framed out. The existing framing was in great shape apart from chipping paint, so I only needed to remove the window sash, screen, and window frame.
Here’s how I did that…
I started by taking off the interior trim around the window using a hammer and pry bar, taking care not to break the existing window in the process. Next, I removed the window and sash by unscrewing the hinges that attached the sash to the window frame. This particular window had two small hinges at the top (it swung open into the room) that required removing just eight small screws.
With the interior trim and window sash out of the way, I removed the window screen from the window frame. The screen was held in with simple nails and pins, and once removed, the screen just fell out into the yard outside. Pretty simple!
I then used my hammer and pry bar to take the window frame out of the rough opening. Again, this just required a little brute force because the frame was only attached to the rough opening by a few nails.
In many cases, though, a basement window replacement requires you to cut the existing wood or aluminum window frame with a reciprocating saw. Whatever the case with your existing basement window, the goal is to remove whatever you need to get down to a clean, smooth, and square opening.
Prepping the Opening for a New Basement Window

The only real prep work I needed to do was clean up the surface of the wood frame in the rough opening. I used a utility knife to cut away any leftover caulk, then used a paint scraper to get rid of any chipping or flaking paint.
I wanted to get the painted and unpainted parts of the frame as smooth as possible, so I used a sanding block with 120-grit paper on one side. Normally, I’d use my DEWALT DCW210B random orbit sander for a task like this, but since the surface area and working area were so small, a sanding block was the better option.
With all the prep work complete, I got out the ol’ shop vac and thoroughly cleaned the window frame. What I was left with was a wood-framed rough opening that was ready for the new window. Again, this is probably the best-case scenario I could’ve hoped for. Many basement window replacements require new framing at the very least, if not chiseling away mortar and concrete to allow the new framing to fit.
How to Install a Basement Window
Necessary Tools:
Screws and impact driver or hammer and nails
How to Install a Basement Window Step-By-Step

Prepare the window opening by attaching flashing tape to the sill. Take the flashing tape up either side of the window opening, about one-third of the way up, as shown above. This helps prevent moisture ingress and protects the wood framing in the rough opening.
Dry fit the basement window in the rough opening. If you have a new construction window with nailing flanges, run a bead of caulk on the backside of each flange before fitting the window in place. Then use rot-resistant shims to center the window in the rough opening.
Use a level to ensure the window is plumb (by placing the level on the face of the window frame). Then level it by holding the level against the top and bottom of the window frame. Lastly, square the window by measuring diagonally from top-left to bottom-right and bottom-left to top-right. These two numbers should match or be within 1/16th of an inch. Adjust the window as needed, adding or removing shims to help stabilize the window in place.
Attach the basement window to the framed opening. This can be done several ways. First, you can drive screws through the sides and/or top and bottom of the window frame, through the shims, and into the wood framing. This method is used with replacement windows that don’t have a nailing flange. Just be sure you don’t over-torque the screws, as that can pull the window out of plumb and square. Second, if you have new construction windows (which is what I used), you can nail through the window’s nailing flange from the exterior and into the framing behind. A third option is to simply use spray foam to hold the basement window in place. I have seen this done in other homes and it seems to work really well, but I can’t speak to its longevity.
Use flashing tape to seal the outside of the basement window. One of the reasons I like using new construction windows with a nailing flange is because the nailing flange overlaps the framing underneath. Then, when you cover the flange and framing with flashing tape, you get another layer of protection from the elements outside (in addition to the seal created by the caulking and flange). You can also use flashing tape with replacement windows that lack a nailing flange, but the surface area you have to apply the tape to the window is much smaller. Still - it’s better than not using flashing tape!
Use spray foam insulation for windows and doors to seal the gaps between the basement window frame and the rough opening. Using foam for windows and doors is absolutely critical. Some foams expand too much, which can cause the window frame to bow and the window to become inoperable. Window and door spray foam is specially formulated to prevent this.
Trimming Out the Window

Allow the spray foam insulation to cure for a couple of hours. Then, once it’s dry, use a utility knife to cut the excess foam out to create a flat surface for the interior window trim. If you were careful when removing the old window trim and the new window is the same size, you might be able to reuse it. I didn’t like the trim that was around the old window, so I will trim the window out (at some point in the near future) with new wood and paint it to match the rest of the room. No rush on that since the rest of my media room isn’t finished yet.
Your new basement window will need outside trim, too. This was the most complicated part of my basement window replacement because I had to cut three of the four pieces of trim to accommodate funky angles. And since this is a basement window, I wanted to give the trim more protection, so I primed and painted each side of each trim piece before nailing it into place. Then, a little caulk, nail filler, and some touch-up paint was all I needed to finish the job!
FAQs About Basement Window Replacement
-
The best basement window depends on your specific situation. Slider windows open and close by sliding the window horizontally and are a favorite for basements, especially when replacing a non-egress window. Awning windows, which hinge at the top and either open out or in, are also common choices for basement window replacement because of their horizontal shape and small form factor. Egress windows are a popular option today and are large enough for adults to climb out of in case of an emergency. These windows might be sliding, casement, or single or double-hung, among others.
-
Installing a new basement window is not considered a hard DIY Project. It often requires basic skills and tools and can be completed by beginner DIYers in a few hours. Some installs are more complicated than others. If you start the process of replacing your basement window and encounter difficulties, it is wise to call a professional.
-
Basement windows bring natural light and fresh air into basements. Replacement windows do so while also preventing drafts and improving energy efficiency. New basement windows often provide improved security from intrusion and better safety with tempered glass.
-
Basement windows are readily available at big box stores like Mendards, Lowe’s, and Home Depot. You can also buy windows at your local hardware store.